Microsoft Office Something Went Wrong While Downloading Your Template
At the end of a letterhead blueprint project, information technology's pretty common to hear your client say: "I desire this every bit an editable letterhead template in Microsoft Word." They ordinarily don't own or know how to use advanced graphics-editing programs like Adobe Illustrator, InDesign or Photoshop, and it but doesn't make sense for them to purchase those expensive programs.
Microsoft Word is pretty low-tech compared to Illustrator or InDesign; however, that'south what your clients are using and your letterhead design is useless to them if they tin't edit and add content to it, so knowing how to create a Microsoft Word letterhead template is cardinal. Let's go started.
1. Create your letterhead design
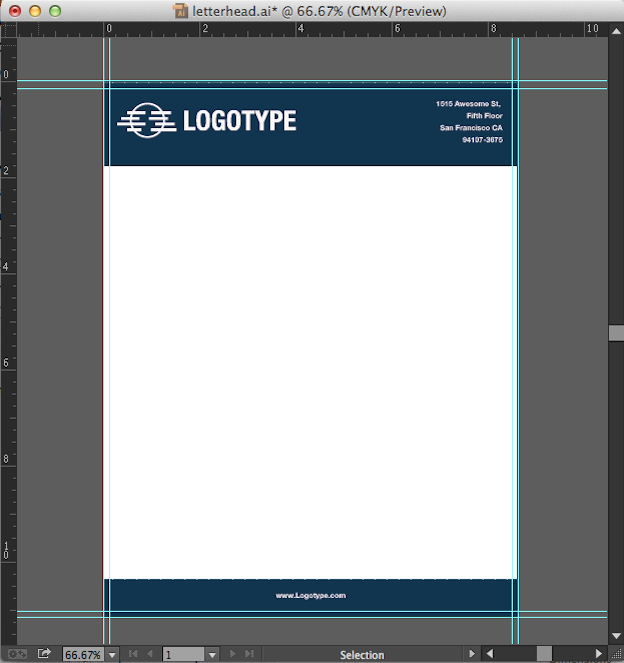
We've created this example in Illustrator, but Photoshop and InDesign can be used to create letterhead designs besides. We're using a full bleed design in this instance with a 1/8″ bleed, which volition requite s u.s. a document that is virtually 8.63 ten xi.13 inches.
Create your design in CMYK color style, and if y'all're using photos or complex graphics make certain that they 300ppi or higher, because Microsoft Word compresses all images that you identify into it. There'southward a bully full-bleed letterhead template that yous tin download here.
2. Export your letterhead pattern as a high res PNG file
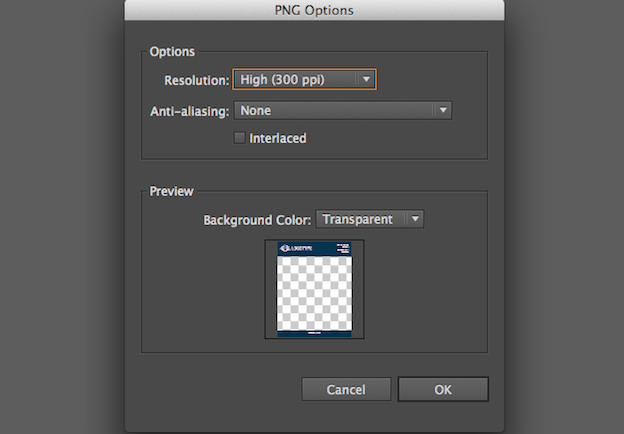
To exercise this, click File > Export > PNG. Make certain yous select 300 ppi as the resolution. Yous tin can also save your pattern every bit a JPG and even as a TIFF; however TIFF files will dramatically increase files size and loading times in Microsoft Give-and-take for your client.
3. Set up your Microsoft Word document
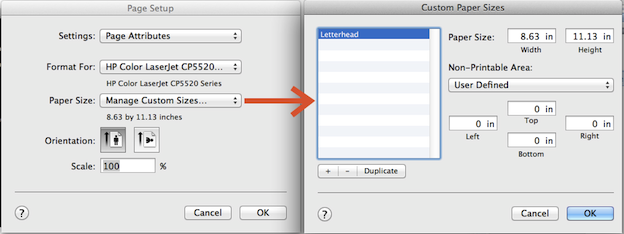
Next, set up up a Word document to insert your letterhead blueprint into. Click File > New Bare Document. While the document opens, click File > Page Setup > Paper Size > Manage Custom Sizes. Set up the newspaper size to eight.75 x 11.xiii to accommodate your full bleed blueprint, set all the margins to "0", and fix the Not-Printable Areas to "User Defined." Doing this lets you lot set upward your letterhead as a full bleed instead of conforming to Word's default margins.
four. Place your letterhead pattern into your Microsoft Word certificate
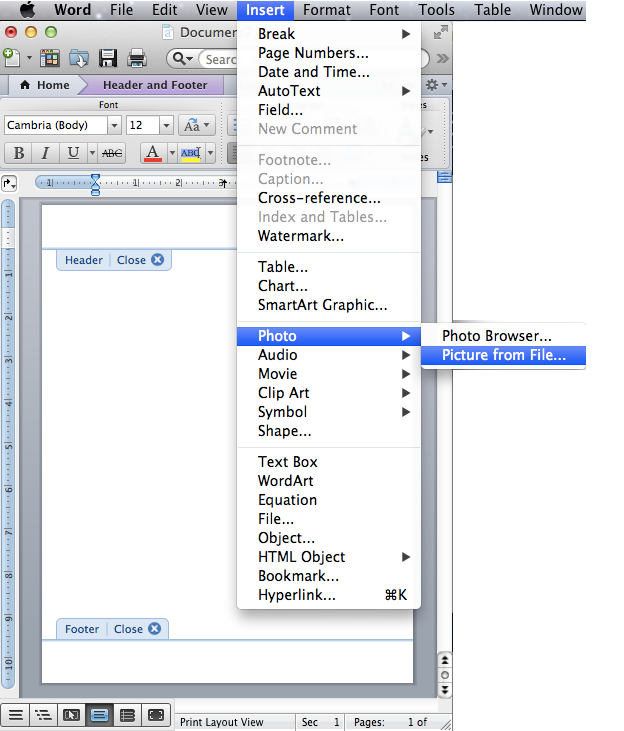
Your letterhead design is going to be placed into the Header and Footer section of your Word document, which will automatically echo on all boosted pages. Go to View > Header and Footer. Now some guidelines for headers and footers volition show up on the document. Click Insert > Photograph > Picture from File. Select your PNG file. Now your .png file will appear centered in the heart of the page. Select the png paradigm, click Format > Picture.

A "Format Motion-picture show" bill of fare will pop up. Showtime, go to Size.Word automatically scales down your artwork, but you tin can fix that by setting the acme and width to 100%.
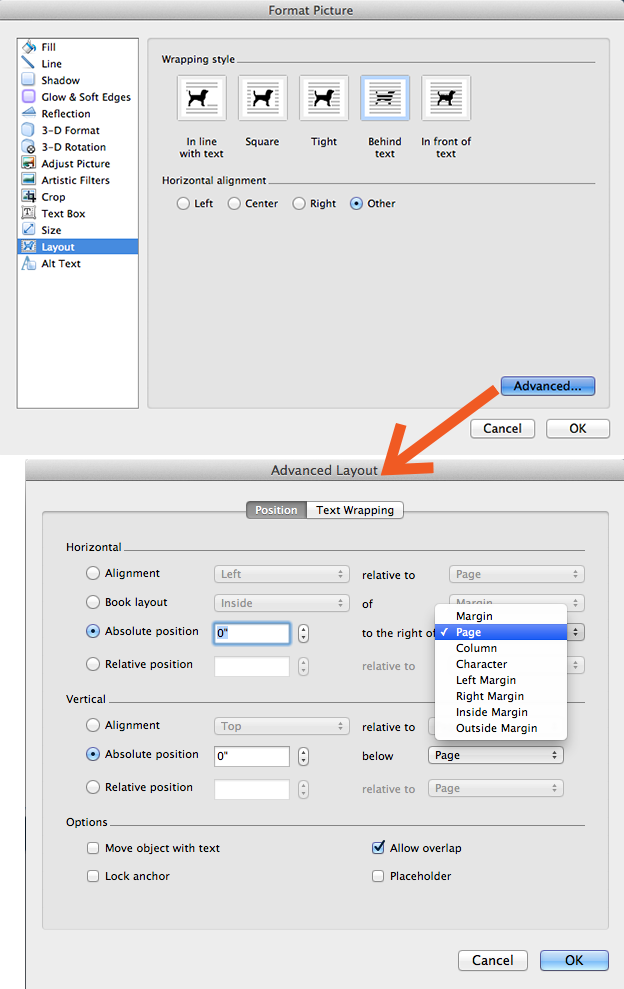
Next, click on the Layout tab, and select the "Backside the text" option. Click the "Avant-garde" button and make sure the Horizontal and Vertical Absolute positions are set to Page. Now hit ok to apply all these motion-picture show formatting adjustments. Your letterhead pattern should at present appear at 100%. Adjust the positioning if needed.
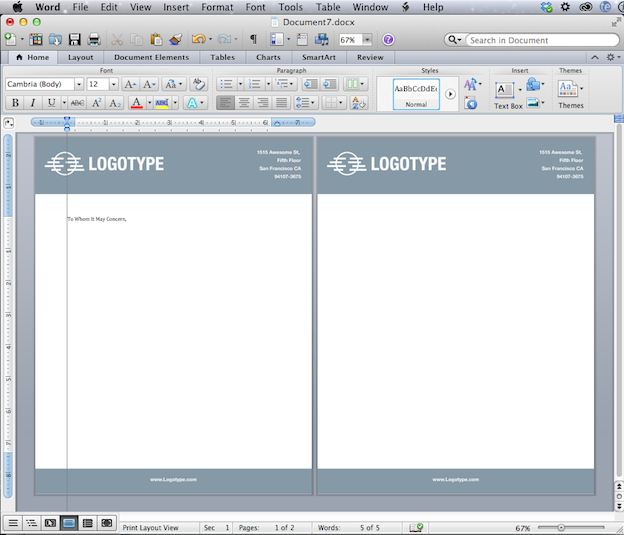
Go to View, and uncheck Header and Footer so that you can get out the Header and Footer area and start editing your text area. Now that y'all're not in header and footer editing mode the letterhead design will appear to exist faded, merely it won't really print that manner so allow your client know that. Adjust your margins and paragraph styles equally desired. If y'all hit render until word creates a new page for yous, you'll notice that the same blueprint has appeared on the next page. This is because you inserted your pattern into the header and footer section of the document, and the design will automatically echo on every additional folio.
v. Salvage it as a template
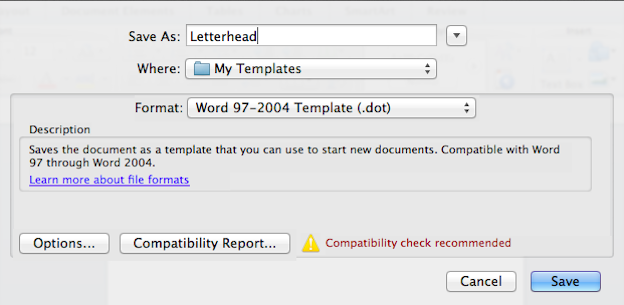
Go to File > Salve As. Cull .dot as your format and Save. At present you can send your editable Microsoft Give-and-take letterhead template to your client!
half-dozen. Prepare the Microsoft Word letterhead template for printing
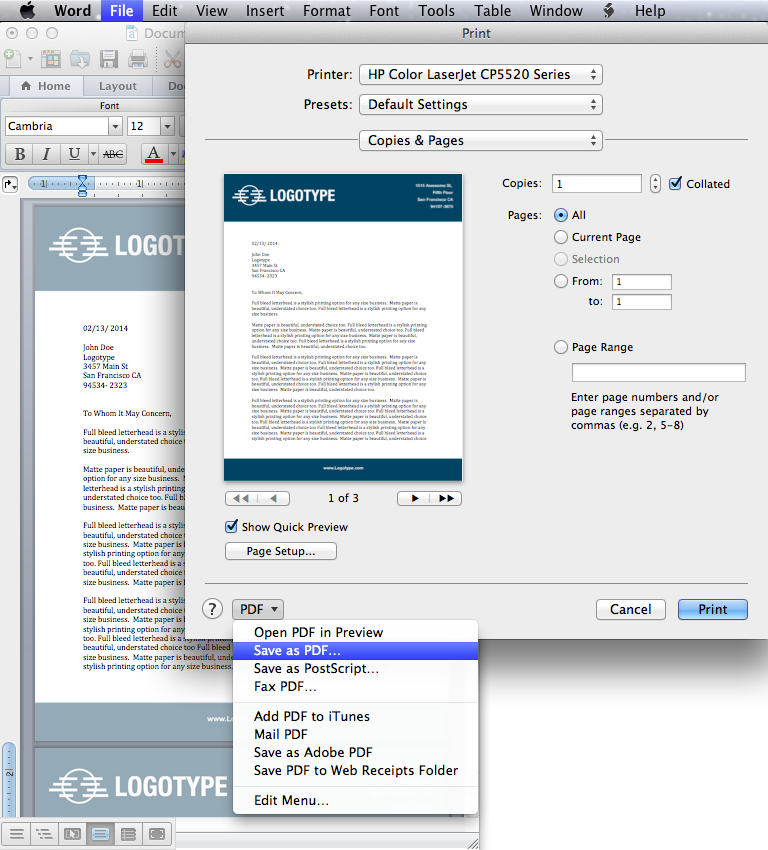
If your client is printing the Microsoft Give-and-take letterhead template at a printer who is able to print full-bleed pages, tell your client to save the finished file as a PDF file for amend printing results . Printing directly from a Microsoft Give-and-take document can have mixed results. To save the template as a PDF, become to File > Print > Save to PDF. At present the file is ready to print 🙂
It'due south important to permit your client know the colors in your Microsoft Word letterhead template will display the colors slightly differently than the original blueprint. In creating the template, the flim-flam is to get its colors as close to the original design as possible – they simply won't brandish the verbal same way no matter what, and are bound to look different when printed. On the chance that your customer has Adobe Acrobat or Adobe Reader, you should recommend they edit their letterheads in those programs instead because the impress quality will be higher than in Microsoft Word.
Additionally, if the design is total drain and your client wants information technology every bit a Microsoft Give-and-take letterhead template, make certain to inform them that information technology cannot be printed properly on a typical home or office printer, equally this will consequence in a white margin around the edges. They need to take the full-drain design to a professional printer who can impress full-bleed designs.
Microsoft Give-and-take has a lot of disadvantages and is simply not on par with other more advanced graphics-editing programs, simply it's probable what your clients know and yous have to work with that.
Need custom letterhead or other stationery designed?
Our global customs of professional person graphic designers can practise that!
DOWNLOAD HERE
Posted by: kiserancions.blogspot.com


0 Comments